
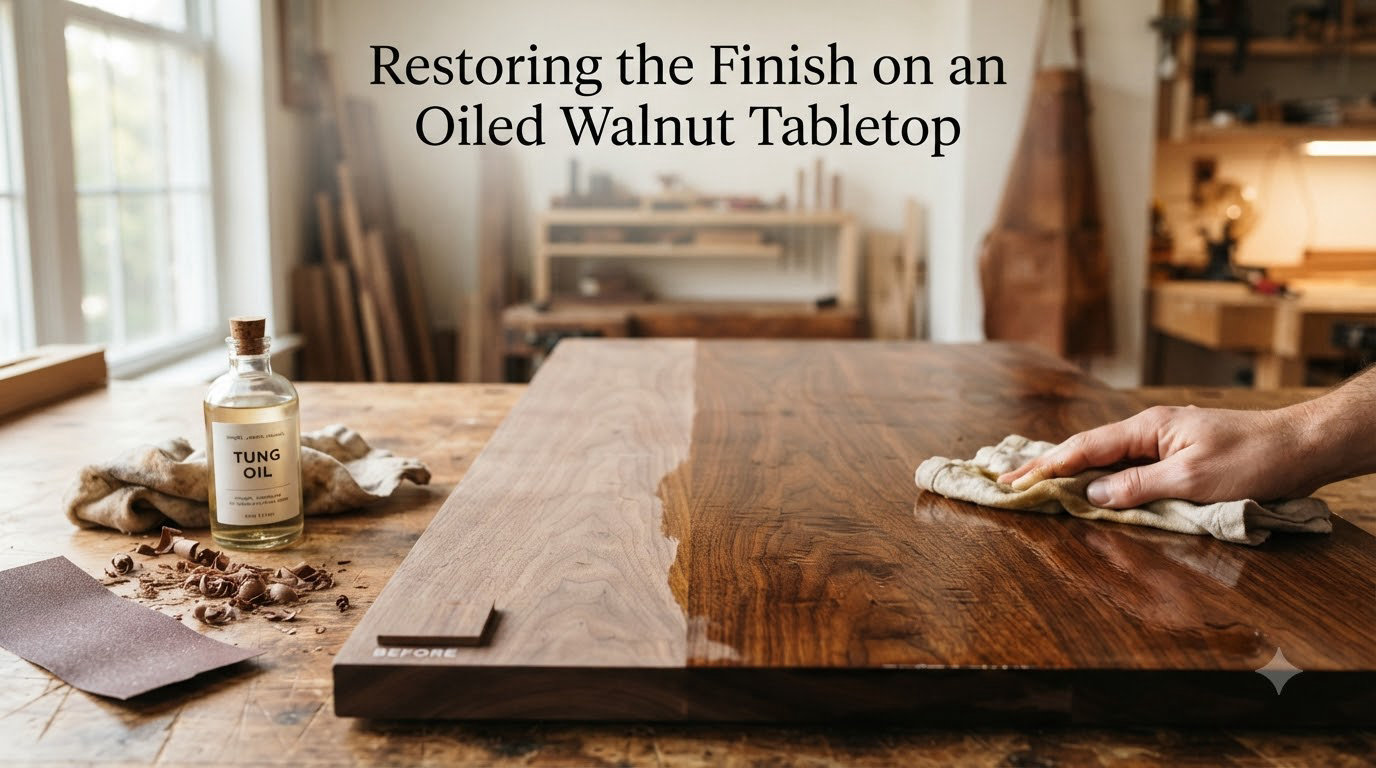
If your dining table has lost its glow and now looks tired and patchy, you are not alone. I have walked into countless homes where a beautiful walnut table sits in the corner, dull and forgotten, when a weekend of work could bring it back.
Restoring an oiled walnut tabletop is one of the most rewarding furniture projects a homeowner can tackle. The wood underneath is usually in great shape. What is failing is the thin layer of oil and wax that protects it. Feed the wood back what it needs and the original warmth comes rushing through.
In this guide, I will walk you through the exact process our shop team uses on client pieces. You will learn how to assess damage, choose the right oil finish, and apply thin coats that cure into a durable, hand-rubbed luster. By the end, your walnut tabletop should look richer than it did the day it was delivered.
Table of Contents
- Why Oil Finishes Need Periodic Restoration?
- How to Assess the Condition of Your Oiled Walnut Tabletop?
- Choosing the Right Oil Finish for Walnut
- Tools and Materials You Will Need
- Step-by-Step Process for Restoring an Oiled Walnut Tabletop
- Common Mistakes to Avoid When Restoring Walnut
- Maintenance Tips to Make Your Finish Last Longer
- Frequently Asked Questions
- Final Thoughts on Restoring an Oiled Walnut Tabletop
Why Oil Finishes Need Periodic Restoration?
Oil finishes penetrate wood fibers rather than forming a hard film on top. Tung oil, danish oil, and boiled linseed oil all soak into the grain and cure by reacting with oxygen. This creates a natural, low-sheen look that highlights walnut’s chocolate tones.
The trade-off is that oil finishes slowly wear away with use. Every wipe of a damp cloth, every place mat dragged across the surface, and every sunny afternoon slowly removes a microscopic layer. After 18 to 36 months of regular use, the wood is asking for more.
Unlike polyurethane or lacquer, you cannot simply buff away surface scratches on an oil finish. You need to clean, lightly abrade, and feed the wood fresh oil to restore protection and color.
How to Assess the Condition of Your Oiled Walnut Tabletop?
Run your hand across the surface first. A healthy oiled walnut tabletop should feel smooth and slightly waxy. If it feels chalky, sticky, or rough, the finish is overdue for attention.
Look for these specific signs to decide between a simple recoat and a full refinish:
Light dullness, no scratches: A clean and recoat with oil and paste wax is enough.
Cloudy or white water marks: Light sanding and recoat will usually fix these.
Visible scratches, gouges, or stain blotches: You will need full sanding through to bare wood.
Tacky or sticky surface that never cured: Strip with mineral spirits before re-oiling.
Here is a simple rule our team uses on every job. If water beads on the surface, the finish is still doing its job. If water soaks in and darkens the wood within 30 seconds, the oil is gone and restoration is overdue.
For veneer tops, always test on an inconspicuous spot first. Veneer can be paper-thin on older pieces, and aggressive sanding will burn through it quickly. A chemical approach with mineral spirits and a non-abrasive pad is safer when you cannot confirm the veneer thickness.
Choosing the Right Oil Finish for Walnut
Pure tung oil gives the most natural look and the deepest water resistance. It penetrates slowly and cures by oxidation over 15 to 30 days between coats. Expect to apply 4 to 7 coats for full protection on a tabletop.
Danish oil is a blend of tung oil, varnish, and mineral spirits. It builds faster, cures in 24 to 48 hours, and gives walnut a warm, hand-rubbed sheen after 3 coats. Most beginners get great results with danish oil because it is more forgiving.
Boiled linseed oil (BLO) is the traditional choice and the easiest to find. It darkens walnut more than tung oil, brings out strong grain contrast, and cures in about a week per coat. Avoid raw linseed oil on tabletops. It can take months to cure and stays tacky.
For a tabletop that sees daily use, our team reaches for pure tung oil on heirloom walnut and danish oil on modern pieces. Both options outperform BLO in scratch resistance when fully cured.
Tools and Materials You Will Need
Gather everything before you start. Once you begin sanding, stopping mid-project can leave visible lap lines on the wood.
Random orbital sander (optional, hand sanding works fine for small areas)
Sandpaper in 120, 180, 220, and 320 grit
0000 (super-fine) steel wool or maroon synthetic pad
Mineral spirits and clean lint-free rags
Selected oil finish (tung, danish, or boiled linseed)
Paste wax (neutral or dark walnut tone)
Nitrile gloves and a well-ventilated workspace
Soft brushes for paste wax application
Step-by-Step Process for Restoring an Oiled Walnut Tabletop
Restoring an oiled walnut tabletop follows a predictable sequence. Work through each step in order and resist the urge to skip the curing time between coats.
Step 1: Deep Clean the Surface
Wipe the tabletop with mineral spirits on a lint-free rag to remove old wax, grime, and oil residue. This step tells you what is really underneath. Let the surface dry completely for at least one hour before moving on.
Step 2: Sand Through the Old Finish
Start with 120 grit to remove the remaining oil and any surface scratches. Sand with the grain, not against it. Move to 180 grit to erase the 120-grit scratches, then 220 grit for final smoothing.
For walnut veneer, stop at 180 grit. The wood is soft and you can blow through veneer in two passes with 120 grit.
Step 3: Remove Dust and Open the Grain
Wipe the surface with a tack cloth or a damp rag to lift sanding dust. Then go over the entire top with 0000 steel wool. This step knocks down any raised grain and gives the next coat of oil something to grip.
Step 4: Apply the First Coat of Oil
Pour a small amount of oil onto the surface and spread it thin with a clean rag, working with the grain. Walnut drinks the first coat quickly. Keep the surface wet for 15 to 20 minutes, then wipe off all excess.
Any oil that pools on the surface will cure into a sticky mess. Less is more on the first coat.
Step 5: Let Each Coat Cure Fully
Tung oil needs 24 to 72 hours between coats. Danish oil needs 24 hours. Boiled linseed oil needs 48 to 72 hours. A coat is ready for the next round when it feels dry, not tacky, and a fingerprint leaves no mark.
Step 6: Build Thin Coats Until the Wood Glows
Apply 3 to 5 additional thin coats. Between coats, buff lightly with 0000 steel wool and wipe clean. The finish builds from within, not on top. Stop when the wood has that deep, wet look even when fully dry.
Step 7: Finish with Paste Wax
After the final oil coat has cured for at least a week, apply a thin coat of paste wax. Let it haze, then buff with a soft cloth. The wax gives a smooth feel and adds another layer of water resistance for daily use.
Common Mistakes to Avoid When Restoring Walnut
The biggest mistakes happen before any oil touches the wood. Here are the ones I see in the shop every month.
Using olive oil or cooking oils. Olive, vegetable, and coconut oil never truly cure. They turn rancid, leave a sticky film, and attract dust. Stick with products labeled for wood finishing.
Skipping grit progression. Jumping from 120 grit straight to 320 leaves deep scratches that show through every coat. Always move through 120, 180, 220, and only finish at 320 if you want a satin-smooth feel.
Applying thick coats. Thick oil coats stay wet for weeks, cure unevenly, and can develop wrinkles. Thin coats that wipe off cleanly always outperform thick coats that puddle.
Sanding through veneer. Older walnut tabletops are often veneered over a softer wood. Test your sander pressure on a corner first. If you see a color shift, stop. You have hit the substrate.
Rushing cure time. Oil finishes harden by reacting with oxygen, not by drying. Putting a tabletop back into service before the oil has cured means scratches and water marks within days.
Maintenance Tips to Make Your Finish Last Longer
A well-maintained oil finish can go 2 to 3 years before needing a full restoration. A few small habits make the difference.
Dust with a soft, dry microfiber cloth weekly. Avoid furniture sprays that contain silicone. They build up over time and interfere with future oiling.
Use coasters under drinks and felt pads under anything that sits on the surface. Water is the enemy of an oil finish, even with paste wax on top.
Refresh the paste wax every 6 to 12 months. A fresh coat of wax restores the smooth feel and adds back water resistance without a full refinish. This is the single best habit for keeping a walnut tabletop looking new.
Keep the table out of direct sunlight and away from heating vents. UV light fades walnut’s rich brown tones over time, and heat cycles cause micro-cracks in the cured oil.
Wipe up spills within minutes, not hours. Even a fully cured oil finish cannot stand up to a glass of water sitting overnight.
Frequently Asked Questions
How do I restore a walnut table top without sanding through the veneer?
Test your approach on a hidden corner first. Use a non-abrasive pad with mineral spirits to lift old finish, then apply thin coats of danish oil without aggressive sanding. If scratches are present, sand by hand with 180 grit only and stop as soon as the scratch disappears.
Can you use olive oil on walnut wood?
No. Olive oil and other cooking oils never fully cure. They turn rancid, leave a sticky residue, and damage the wood over time. Use tung oil, danish oil, or boiled linseed oil labeled for wood finishing instead.
How do I bring back the luster of wood without a full refinish?
Clean the surface with mineral spirits, buff lightly with 0000 steel wool, then apply one thin coat of danish oil or tung oil. Once cured, top with paste wax and buff to a soft sheen. This refresh takes about an hour and works for dull but unscratched tops.
What finish looks best on walnut?
Pure tung oil gives the most natural matte look and highlights walnut’s chocolate tones. Danish oil adds a soft hand-rubbed sheen with faster build. For tabletops that see daily use, our shop recommends danish oil for ease or tung oil for long-term depth.
How do I fix a cloudy finish on a wood table?
Cloudy finishes usually mean moisture got under the surface. Wipe with mineral spirits, let dry, then buff with 0000 steel wool. Apply a thin coat of oil and let cure fully. If cloudiness remains, sand lightly with 220 grit and re-oil.
Final Thoughts on Restoring an Oiled Walnut Tabletop
Restoring an oiled walnut tabletop is a weekend project that pays back every time you sit down to a meal. The wood is forgiving, the materials are inexpensive, and the results show up immediately.
Start by cleaning the surface and assessing what you are working with. Choose a finish that matches your patience level. Apply thin coats and respect the cure time. Finish with paste wax and keep up with light maintenance.
If you are restoring an oiled walnut tabletop for the first time in 2026, take before and after photos. The transformation is the kind of result that makes you look at every other piece of wood furniture in your home with fresh eyes.
1 thought on “How to Restore an Oiled Walnut Tabletop (October 2026) Buying Guide”